
Mail Assure's Protection Reports are due to be deprecated in the near future. Please switch to using Email Scout Reports at your earliest convenience and use these for all future reporting.
The Periodic User Report sends the recipient(s) an overview of the previous day's messages that were quarantined. This can be set up at the Domain level where you can manually add users, import a CSV file of multiple users and enable the report for all recipients.
Access to this report from the Domain Level Control panel is found by selecting Reporting > Protection Report - Mailbox.
Protection reports cannot be configured to run and send on a particular date and time. If you want to configure a report to do this (like a daily digest), the Email Scout Reports feature provides this functionality. For more information, see Manage Automatic or Custom Email Scout Reports. You can automatically enable Email Scout Reports to run up to three times daily at specified times from the Domain Settings page at Domain Level - see Automatically Enable Daily Email Scout Reports.
If catch-all is detected on your destination mail server, the Protection Reports will not send. For more information, see Catch-all and Mail Assure.
Enable Report
- Login to Mail Assure as an Admin Level user and open the domain in question from General > Domain Management or login directly as the Domain Level user
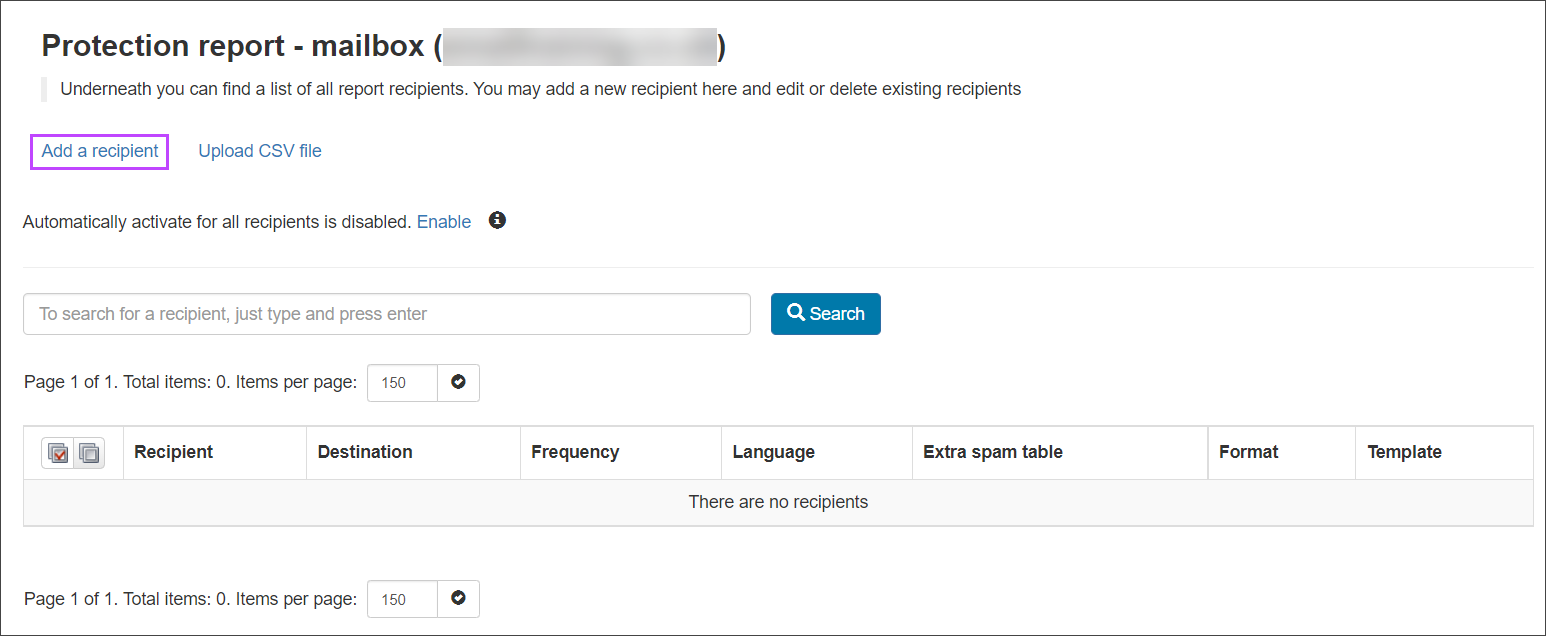
- Navigate to Reporting > Protection Report - Mailbox
Any existing report recipients will be listed in the Protection Report - Mailbox page.
- To enable for:
- All recipients at the domain, click Enable next to Automatically activate for all recipients

- A single recipient at the domain, click on Add a recipient to open the Enable for recipient page
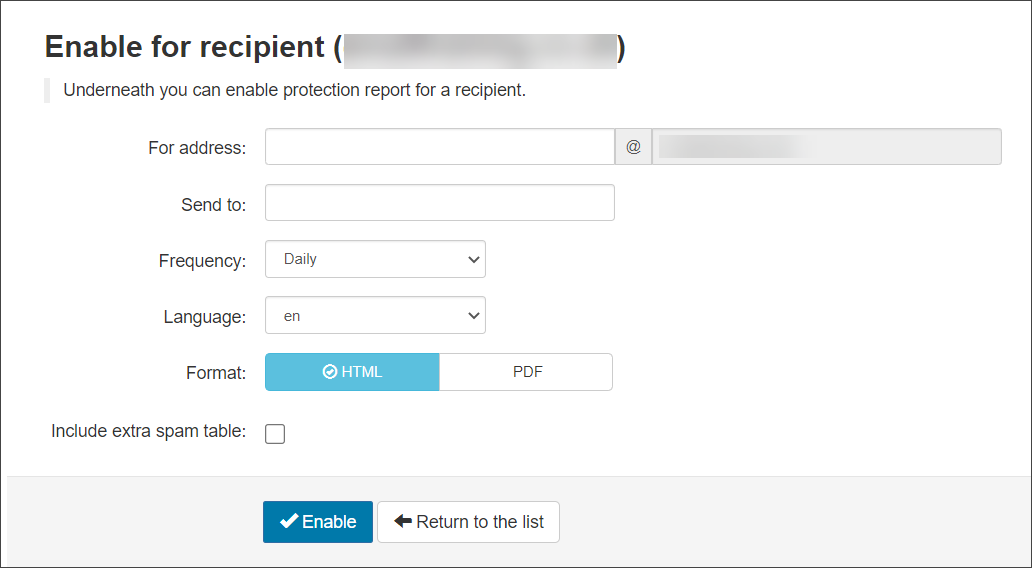
- In the For address field, enter the local part of the user you want to report on, the domain part of the email address will already be filled in and cannot be changed
The local part of an email address is the part before the
@. For example, if the email address isjohn.smith@domain.invalid, the local part isjohn.smith, and the domain isdomain.invalid - In the Send to field, enter the email address you want to send the report to
- Select the Report Frequency from the dropdown. The options are:
- Daily
- Weekly
- Select the Language you want the report to be in. The languages available are:
- da - Danish
- de - German
- en - English
- es - Spanish
- fr - French
- it - Italian
- nl - Dutch
- pt - Portugese
- ru - Russian
- Select the Format of the report. The options are:
- HTML
- If you want to include a table of messages that were rejected but not quarantined, enable the Include extra spam table option
- When finished, click on Enable to activate your report
This table is for informational purposes only, no action can be taken against a message that has already been rejected but not quarantined.
Using the dropdown to the left of the report, you can choose to Edit, Disable or Remove the report.
- All recipients at the domain, click Enable next to Automatically activate for all recipients
Once a user is added to the list they receive a welcome email with a confirmation that their quarantine is enabled.